Mount your camera solidly on a solid tripod.
Shoot a stationary subject at the correct exposure for all the f-stops on your lens.
Review the images to find out if your lens provides acceptable images at its fastest f-stop. If it does then your off to a good start. If not, better results can be expected as you stop-down to a slower f-stop (larger number). This test will also let you see at which f-stops your lens is sharpest. (I call this the lens' Sweet-spot)
Once you have determined what f-stop best suits your intended "look", start shooting.
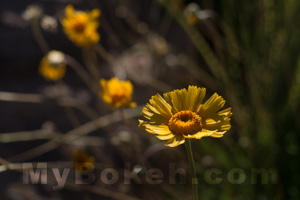
Generally speaking Bokeh is most noticeable when a lens is at its fastest f-stop (smallest number). This creates the shallowest DOF (depth-of-field). DOF defined is the depth of the "acceptable" in-focus area of your image. As you "stop-down" a lens, or use a smaller f-stop the DOF increases... more will be in focus. As you stop-down there is a point where image quality will decrease. Your image will starts looking muddy or washed out and looses sharpness. You will see this in your results from the first tip. Very few adjustable aperture lenses look great at all their f-stops, so when you get time do the test, especially on those lenses you use most often.
Tips to remember...
A lens' Bokeh usually varies noticeably from one manufacturer to another. It may be subtle, or not... look closely and you'll see differences.
The faster the f-stop the more noticeable My Bokeh. This is true to a point as you can completely blur a background on the extremes, at which point there is very little noticeable Bokeh, it just melts away as seen in Tip #3.
|
||
 |
 |
|
 |
 |
|
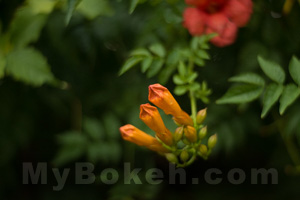
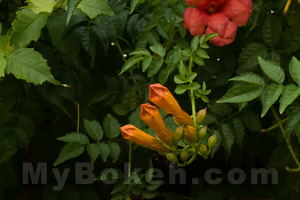
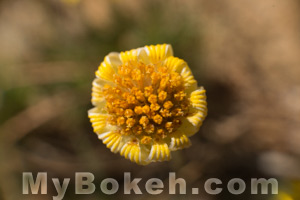
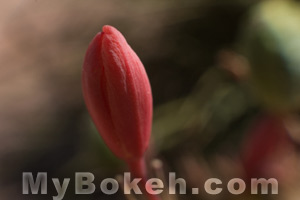
The fastest f-stop does not always provide my best Bokeh.
|
||
 |
 |
|
 |
 |
|
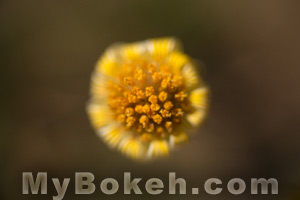
The longer the focal length the more noticeable My Bokeh at the same f-stop.
The more distance between the subject and background the more noticeable My Bokeh.... (to a point, as seen above).
The closer the subject is to the lens the more noticeable My Bokeh. As your subjects get closer, the background will start to blur more noticeably. That "blur" is the lens' Bokeh. If it's too much, you can; 1. use a smaller f-stop. 2. move your subject closer to the background 3. increase the distance between you and your subject 4. use a shorter focal length lens. If it's not enough simply do the reverse of the above options.
The livelier the background the more noticeable My Bokeh. Lights, wadded tinfoil, jewelry and other shiny materials can all create interesting Bokeh props.
Moving the camera slightly can have huge effects in
My Bokeh. Turning the camera 90 or even 180 degrees may also have surprising
results.
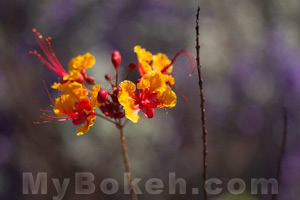
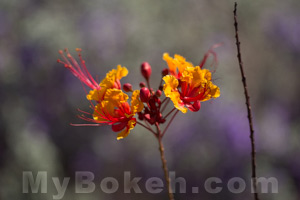
Look how much more visible the Bokeh is on the left image below. This was a
slight re-positioning of the camera and a composition tweak.
 |
 |
Using extension-tubes, bellows or tele-converters to improve My Bokeh may be something that you've overlooked.
Generally speaking the more aperture blades the creamier My Bokeh. This is due to the fact the more blades can create a finer circle.
A lens at it's fastest f-stop is almost always circular - since the aperture blades have not come into play yet. As you stop-down, the aperture shape influences the image, which is usually most noticeable in the image highlights. (Tip 12 images)
A lens' diaphragms shape alters My Bokeh. This is
only noticeable as you stop-down. You can often see the shape of the lens's
diaphragm in your image highlights.
(see how to create custom Bokeh discs below)
Here are two images of an out of focus highlight. The left one
exposed with the lens "Wide-Open" (at its fastest f-stop), creating a
completely circular highlight. The image on the
right was stopped-down a bit revealing the shape of the lens' 7-bladed
diaphragm.


Faster f-stops create larger out of focus areas. The images above were taken from the same position but the highlights become much different in size as we change f-stops.
If you're shooting at an f-stop other than the lenses fastest f-stop make sure to view the scene in a stopped-down view or shoot an image and check the results. If your shooting film or cannot review images right away you'll want to view the scene stopped-down.
Some lenses will produce wonderful Bokeh Wide-Open (a term to denote the lenses fastest f-stop ( smallest number)) but loose their appeal as you stop-down.
Older lenses are not as optically refined as today's computer created designs but some have pictorial qualities that are unique and would be hard to reproduce today.
Stopping the lens down (smaller diaphragm - larger f-stop number) almost always produces a sharper image... to a point. Remember the first tip on this page. If you do the test you'll know that lens' limits.
Lenses with an f-sop of 2.8 and faster may be letting in to much light at these wide setting for the camera to expose properly, especially in daylight shooting. This can be remedied by using ND (Neutral Density) filters. These limit the light and allow the use of faster f-stops at slower shutter speeds. Tip - Use ND filters and long exposures of busy scenes for interesting images.
A lens' diaphragm's shape shows up in the out of focus areas of an image. You can cut any shape out of anything and use it as a diaphragm by placing it on the front of the lens. Take some shots and look at the out of focus areas, especially the highlights. As you stop the lens down to a smaller aperture the shape you cut out will become more prominent so have fun as you experiment!!!
© MyBokeh.com All Rights Reserved.